Fallout 3 - Alien Blaster


Featured
Exclusive
20,719
views
2,281
downloads
60
collections


4 comments

Loading comments... 
Fallout 3 - Alien Blaster
Published 2015-11-16T16:06:31+00:00
489
4
Add to Collection
Description
Suppport me on Patreon here https://www.patreon.com/lilykill, and help me create and get access to more great models.
Here is the Alien Blaster from Fallout 3, consists of 13 parts and has a removable energy cell. When I finish some more of my projects I will hollow out the inside of parts so that there's a load a space to put lights in.
Follow me on twitter @ https://twitter.com/lilykill1, instagram @https://instagram.com/lilykill1/ and like me on facebook @ https://www.facebook.com/Lilykill-253119598353137/ where you can stay up-to-date on my current projects and releases.


Technical Information
| Date published | 16/11/2015 |
| Technologie | FDM |
More Information
Object Parts
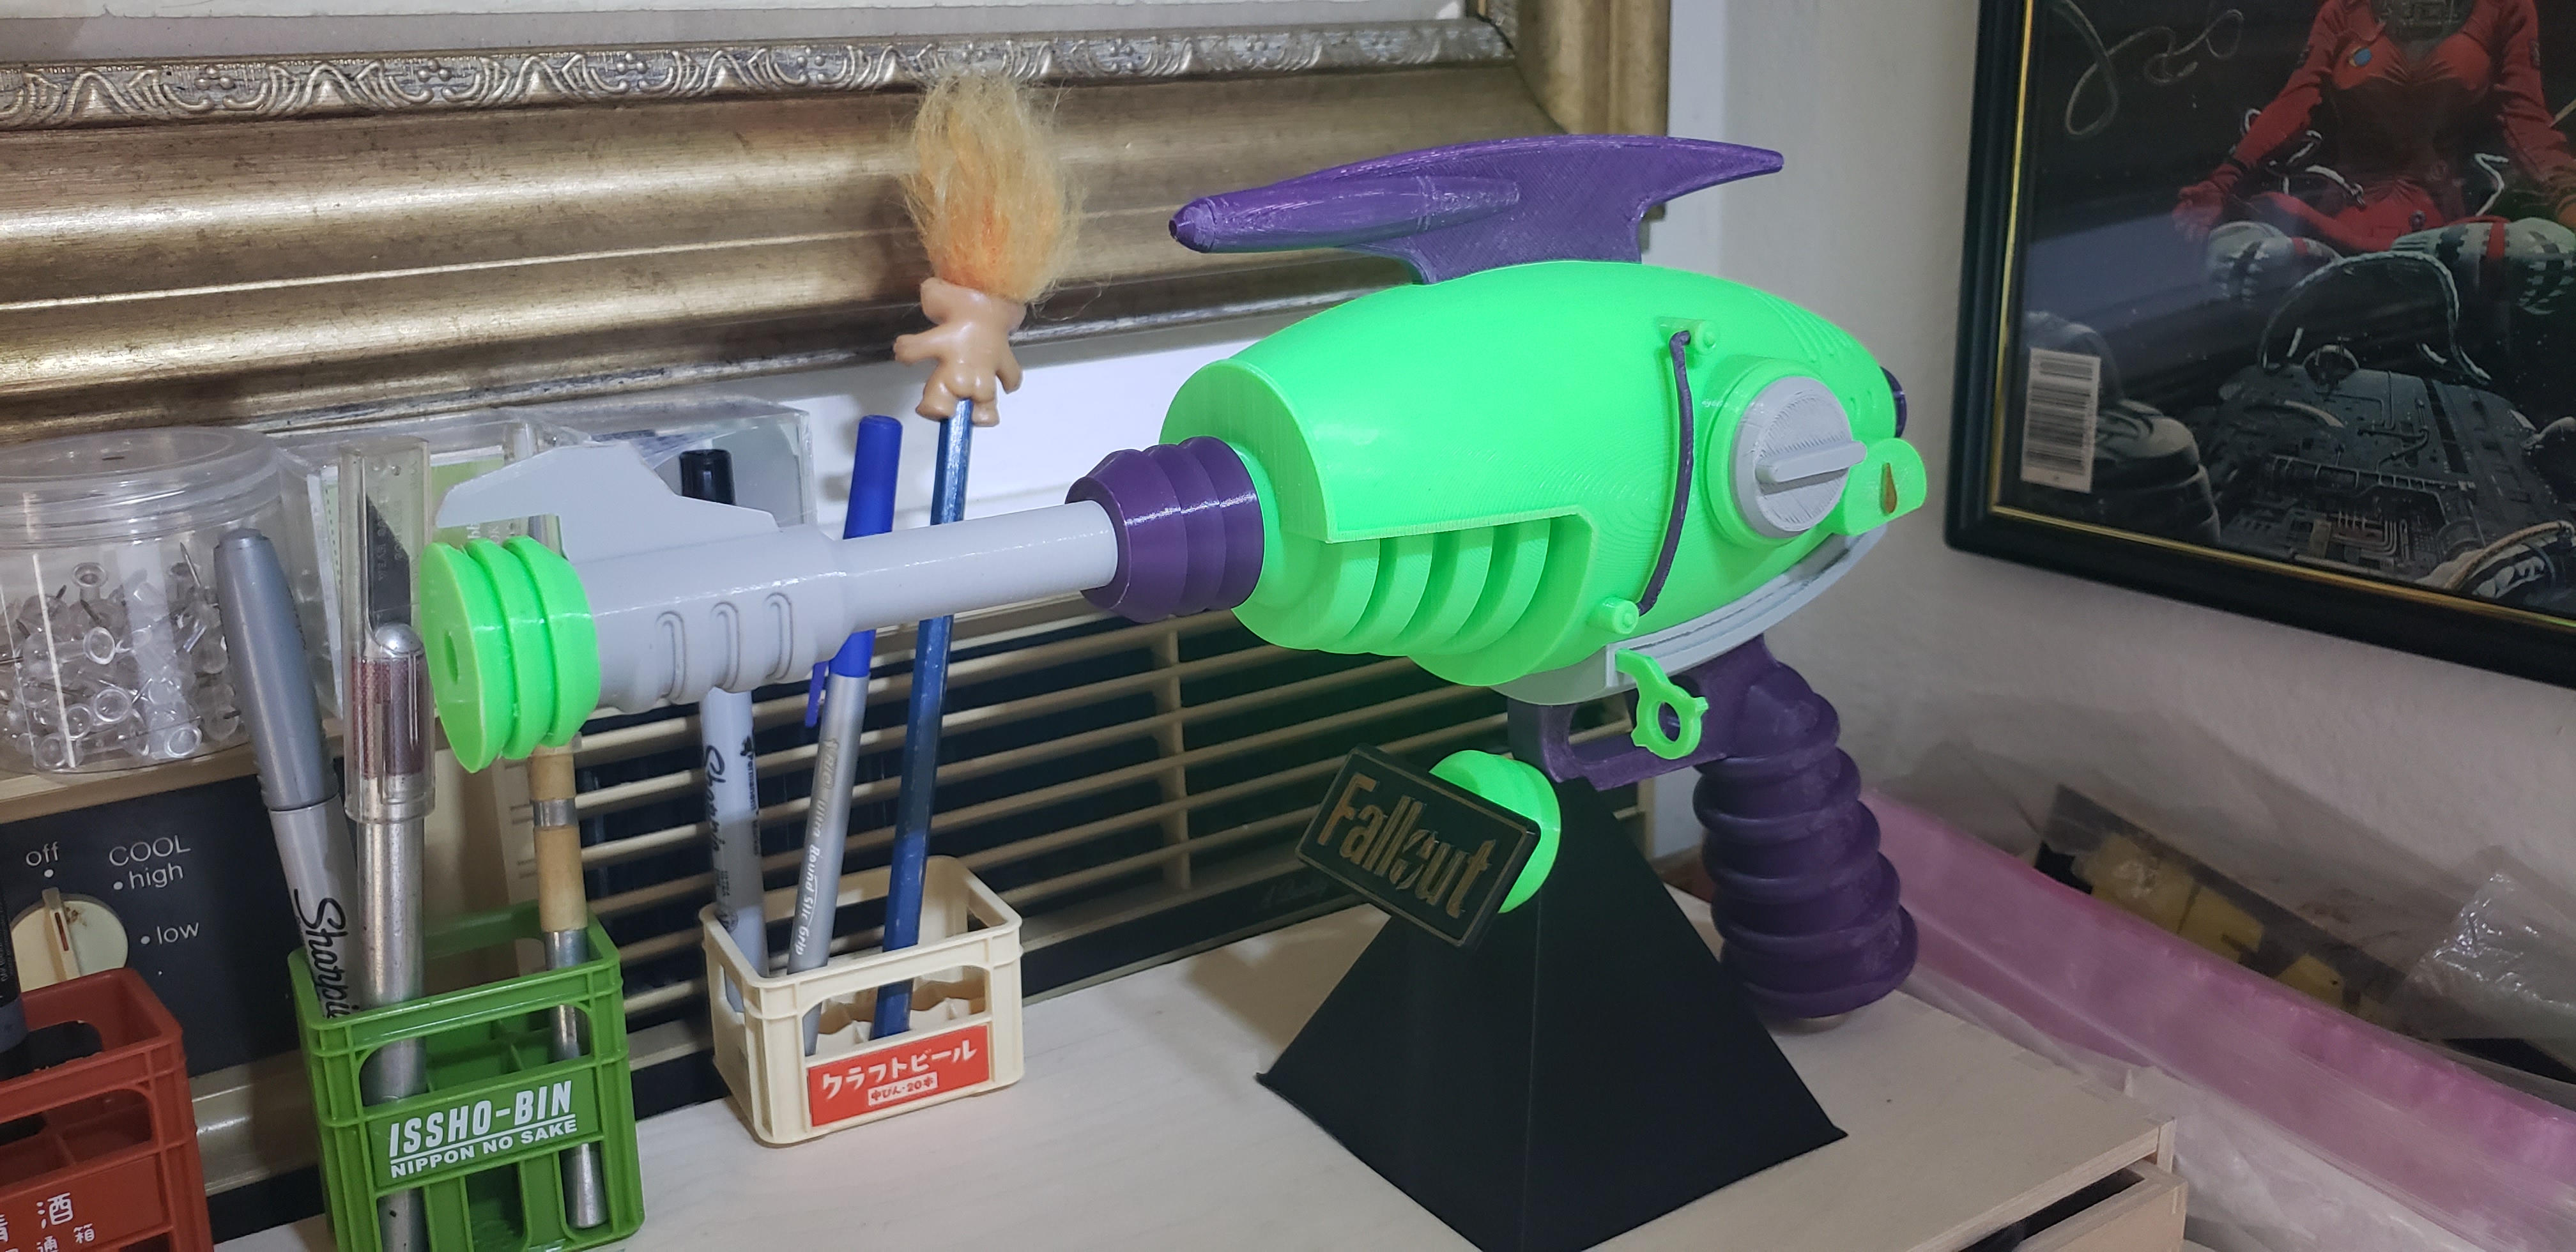
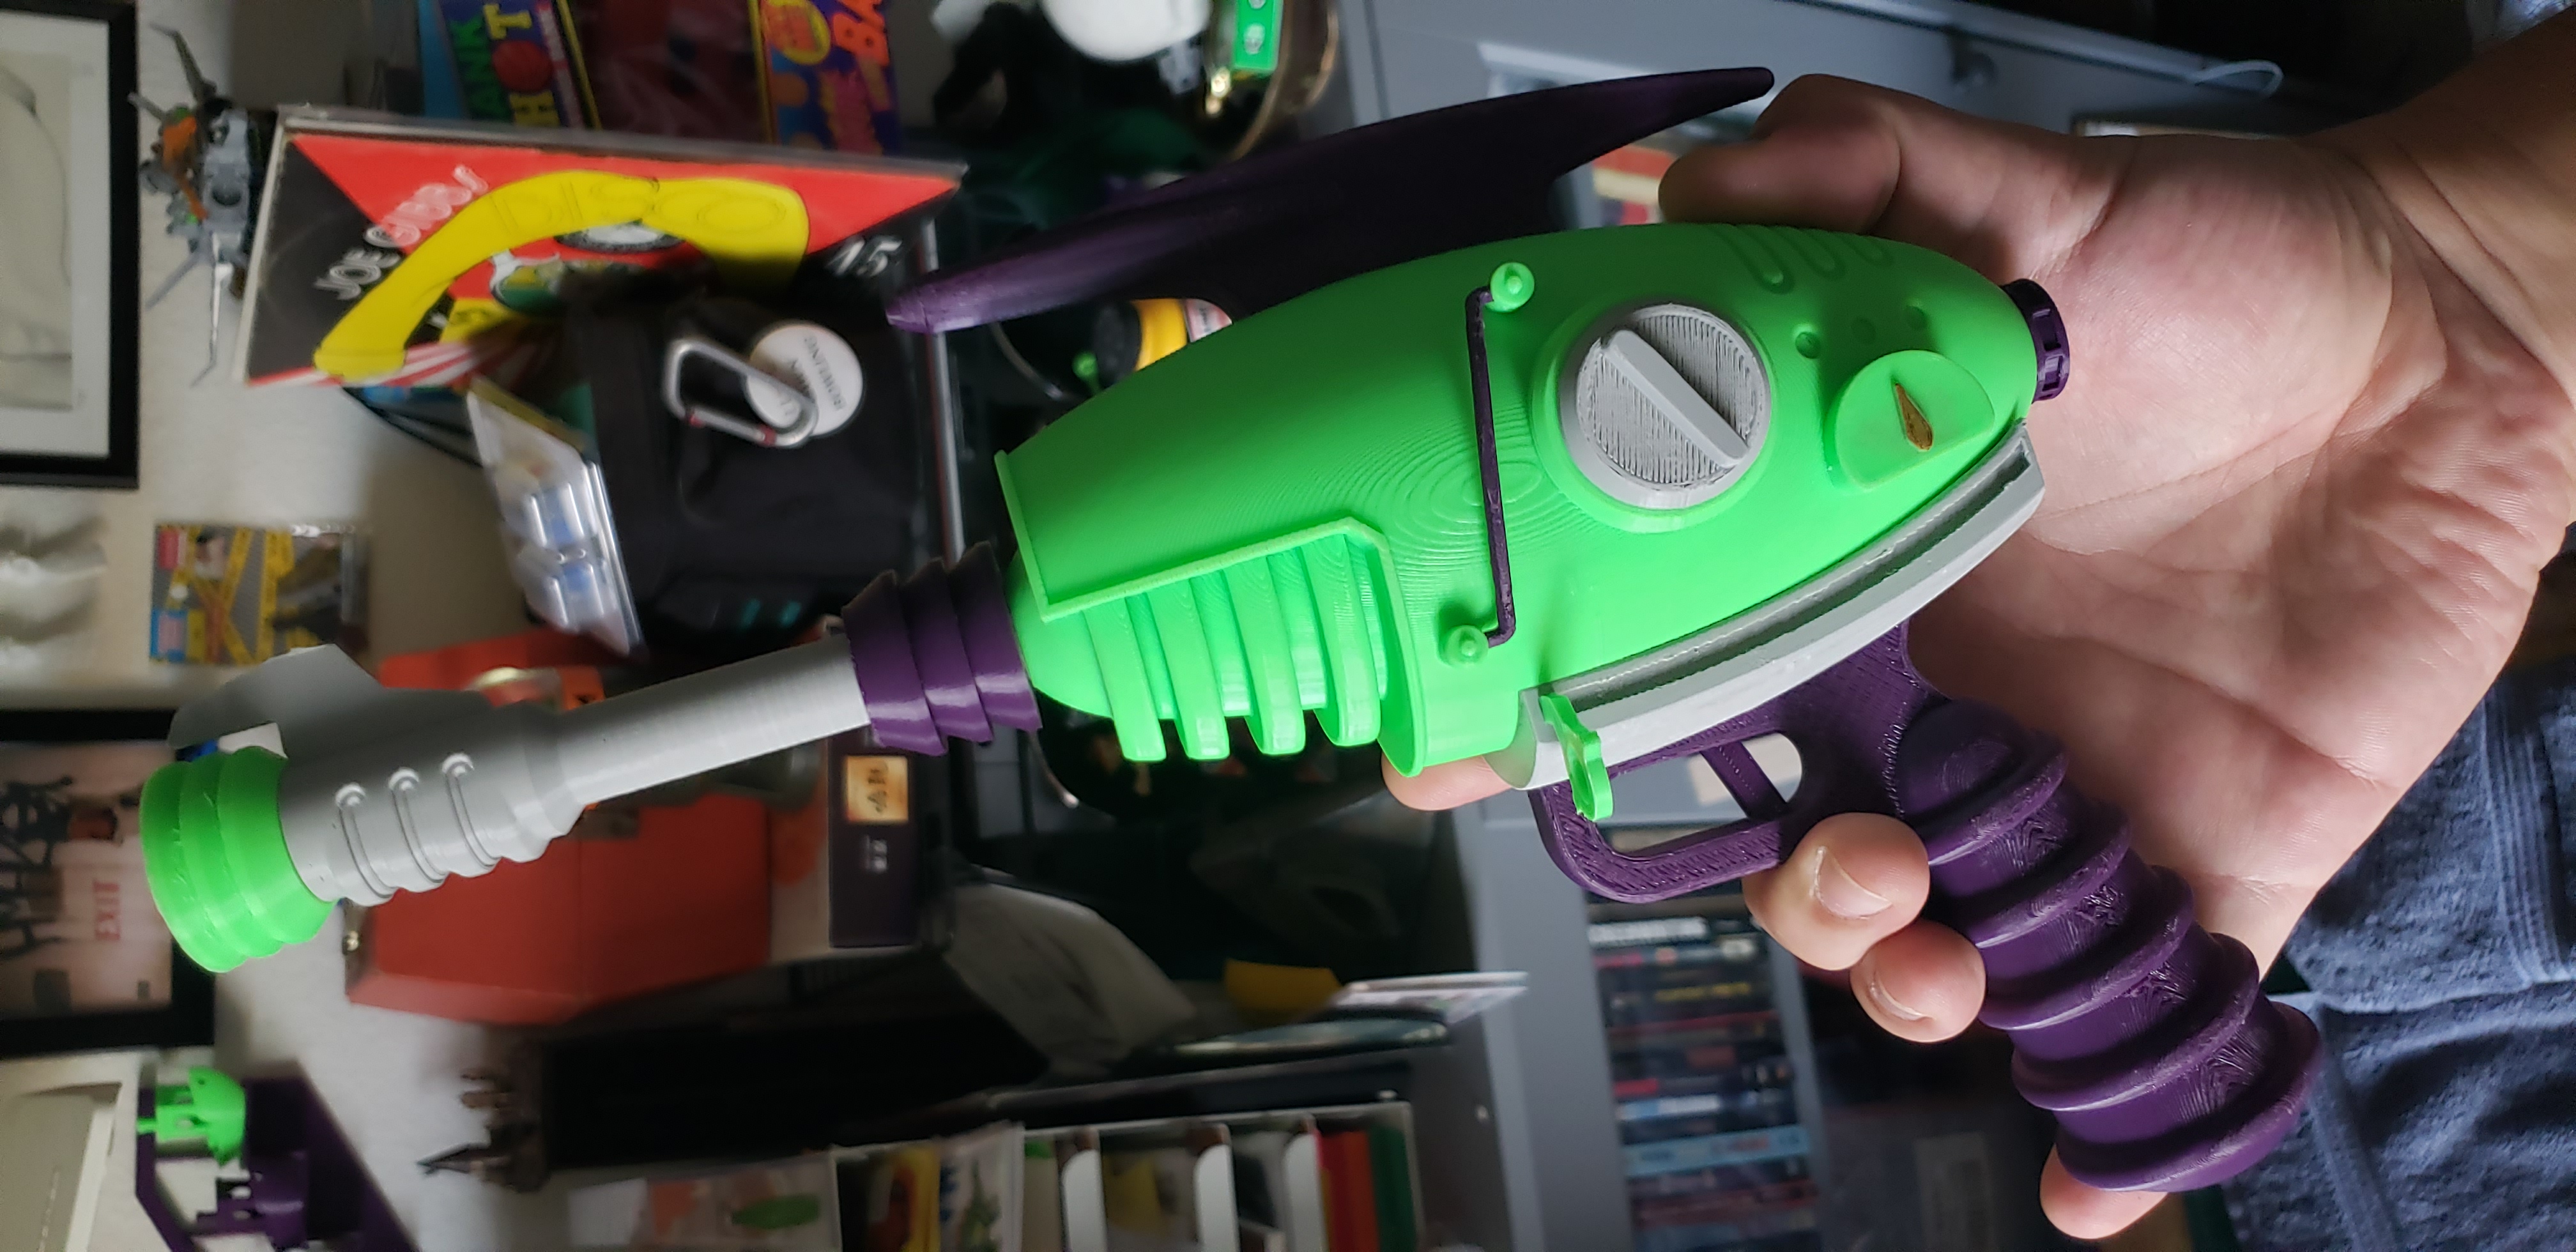
Scaled up 5%. All parts oriented myself. This is my first multi color print and most ambitious print to date, 1 month into 3D printing. I learned a big lesson here, and thats to orient your parts so that the support side is on the side that has less detail and overall will be shown less. As you can see in my print, unfortunately I didn't pay attention to this and ended up having the support sides be on the "main" side of the print. Thankfully I only did this to the handle, fin and battery cell. It doesn't look too bad, but it looks so much cleaner on the opposite side. Printed on an Ender 3 V2, all filament @ 202c/60c, stock extruder, upgraded PTFE tube, aluminum extruder, upgraded bed springs, and a glass bed (smooth side). Filaments used: Hatchbox Neon Green, Atomic Filament Light Grey V2 and Eggplant Purple Solutech. All PLA. Superb design and a very satisfying outcome.This took overall around 40ish hours to print, but thankfully due to my godlike assembly of my printer and solid bed leveling, I printed most of it overnight and it was printed and assembled in less than 48 hours. The stand I made for it ended up not working out so well, it needs an extra support so I ended up using a piece from my first failed attempt. The logo was found on thingiverse.