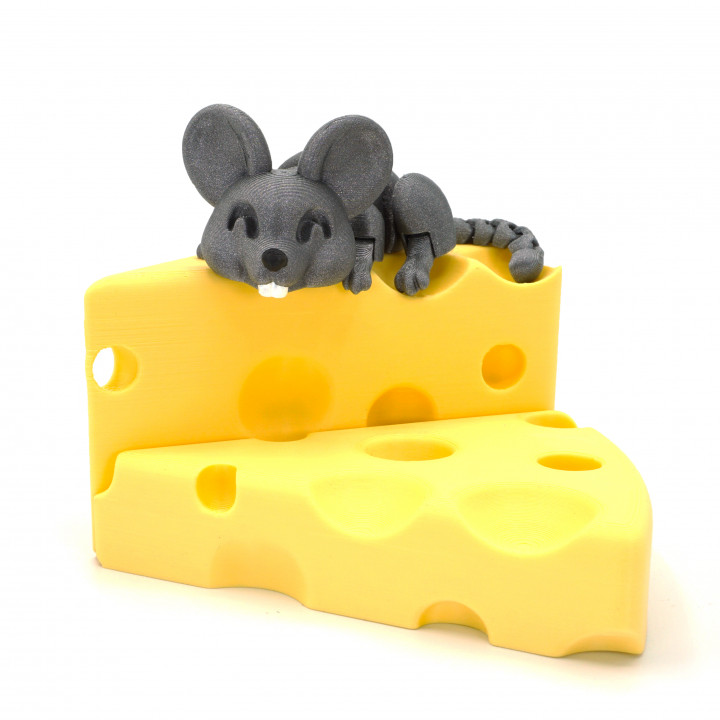
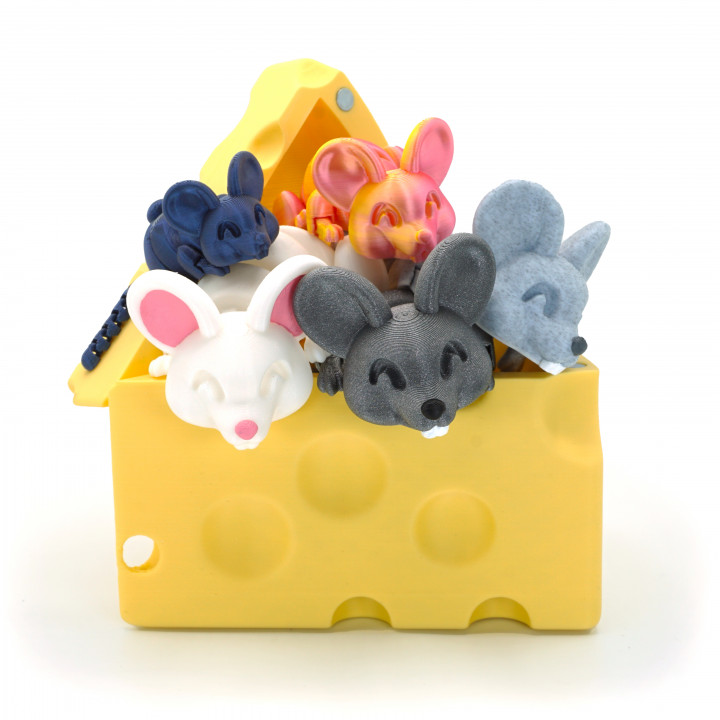
Cheese Boxed Mouse


$3.99 Cheese Boxed Mouse
Published 2022-10-06T14:08:10+00:00
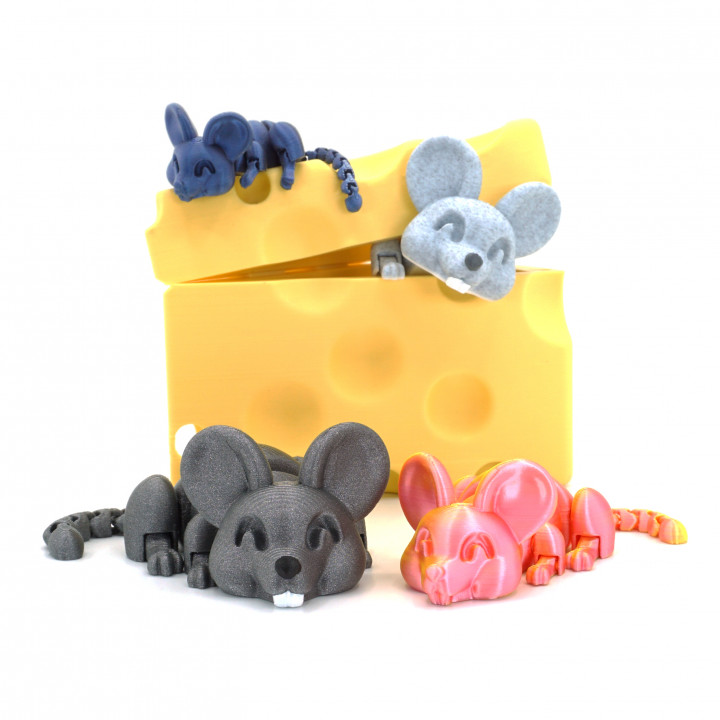
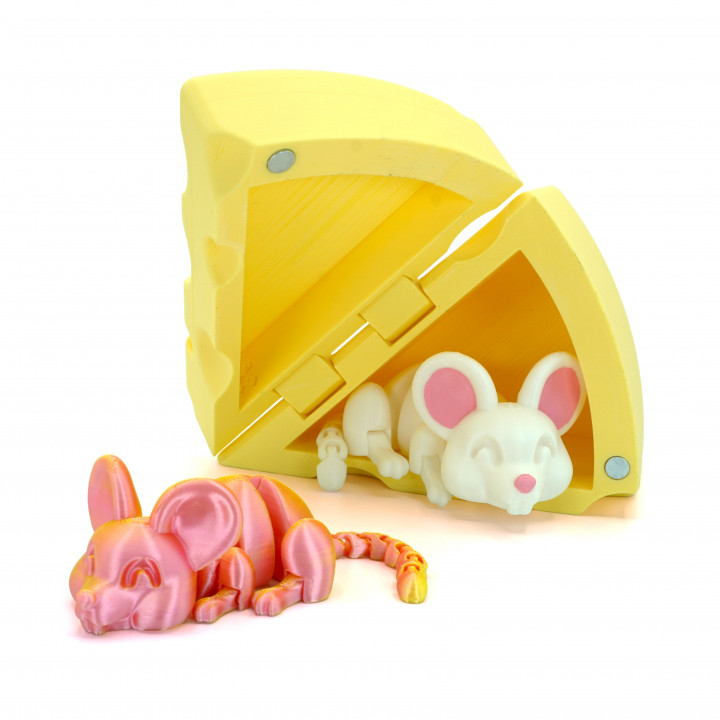
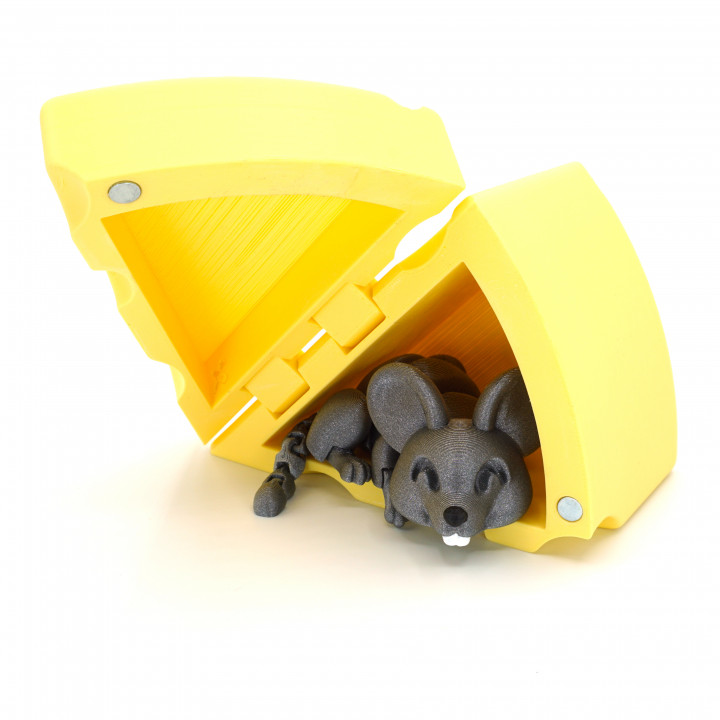
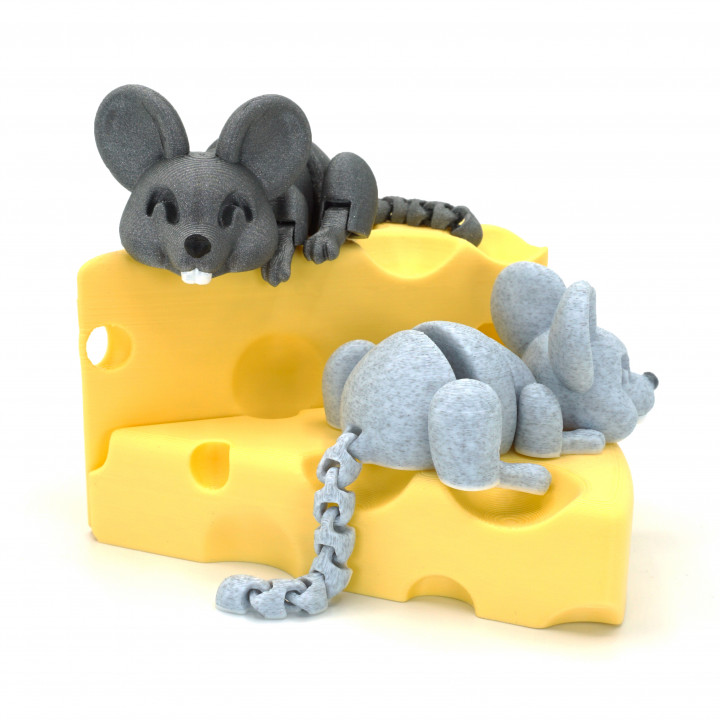
Mouse and Cheese Box!!
Both are print in place with no support and no assembly required. Just slice and print!
Feel free to scale them up or down as much as you want (the limit is your printer).
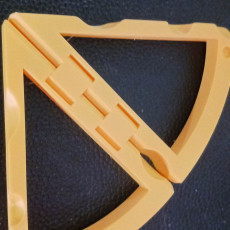
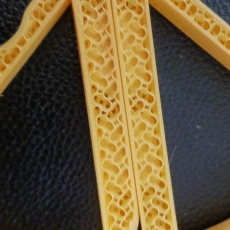
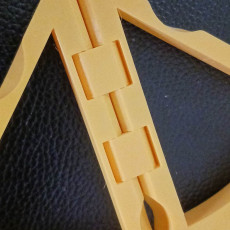
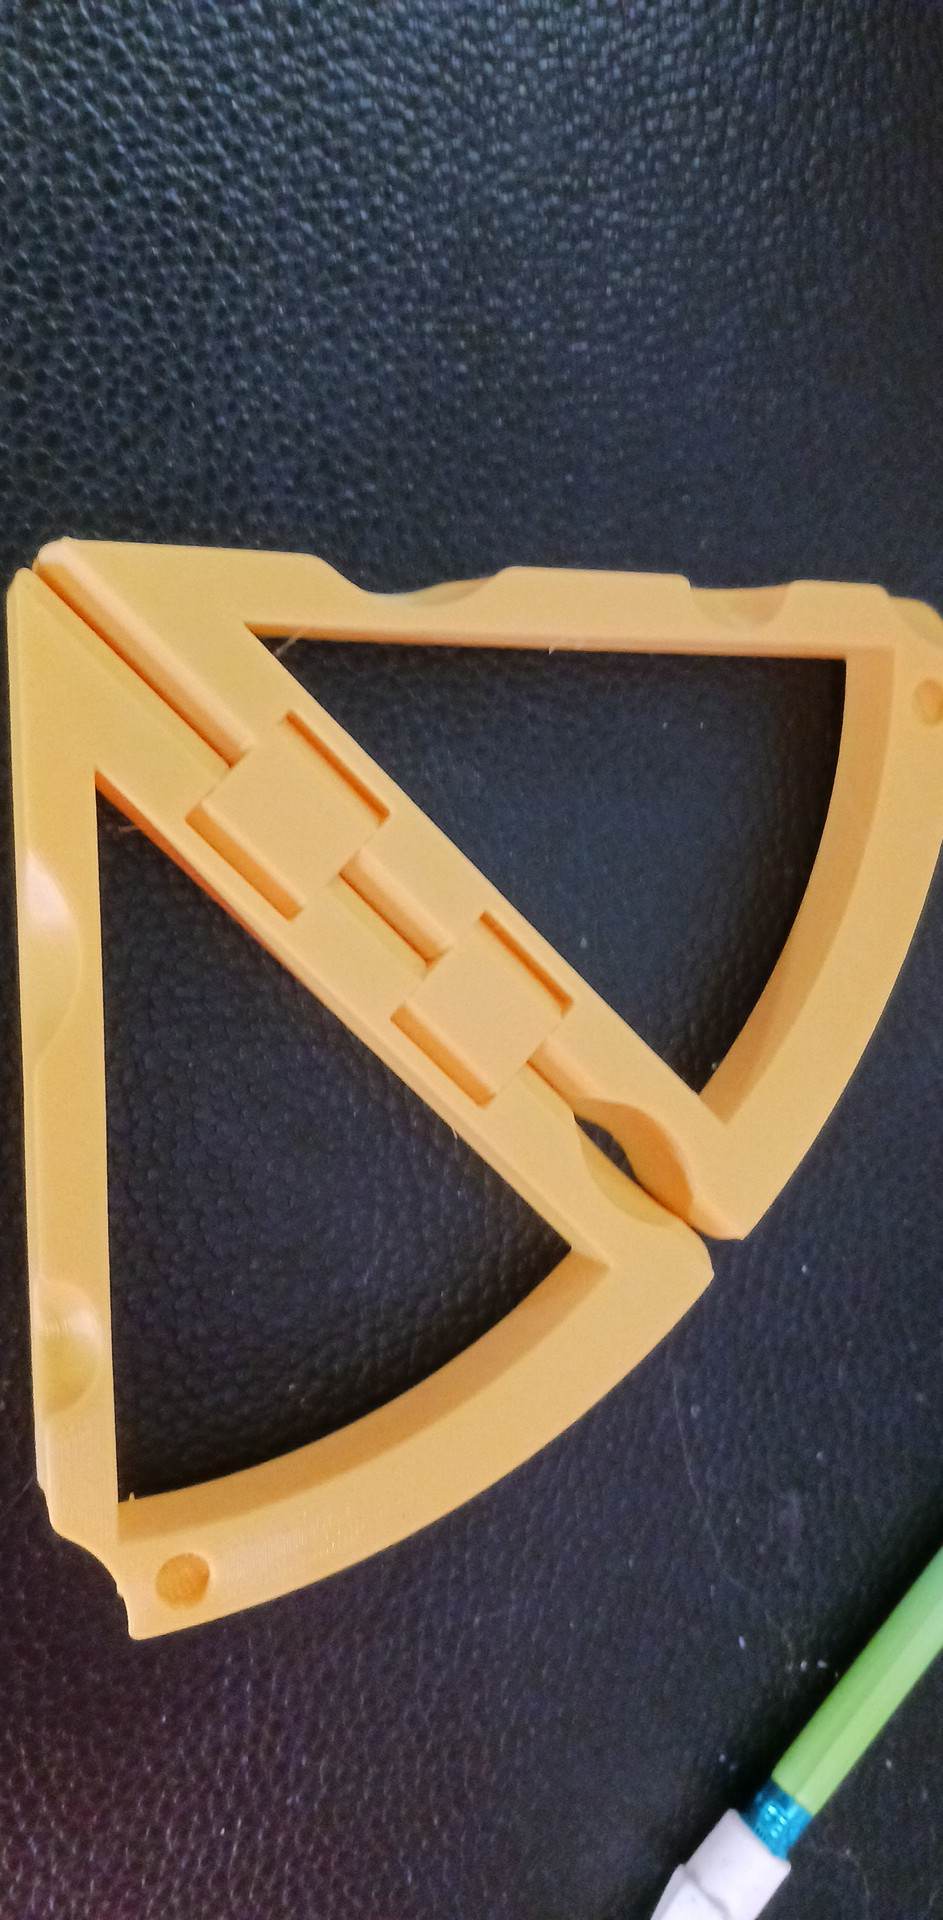
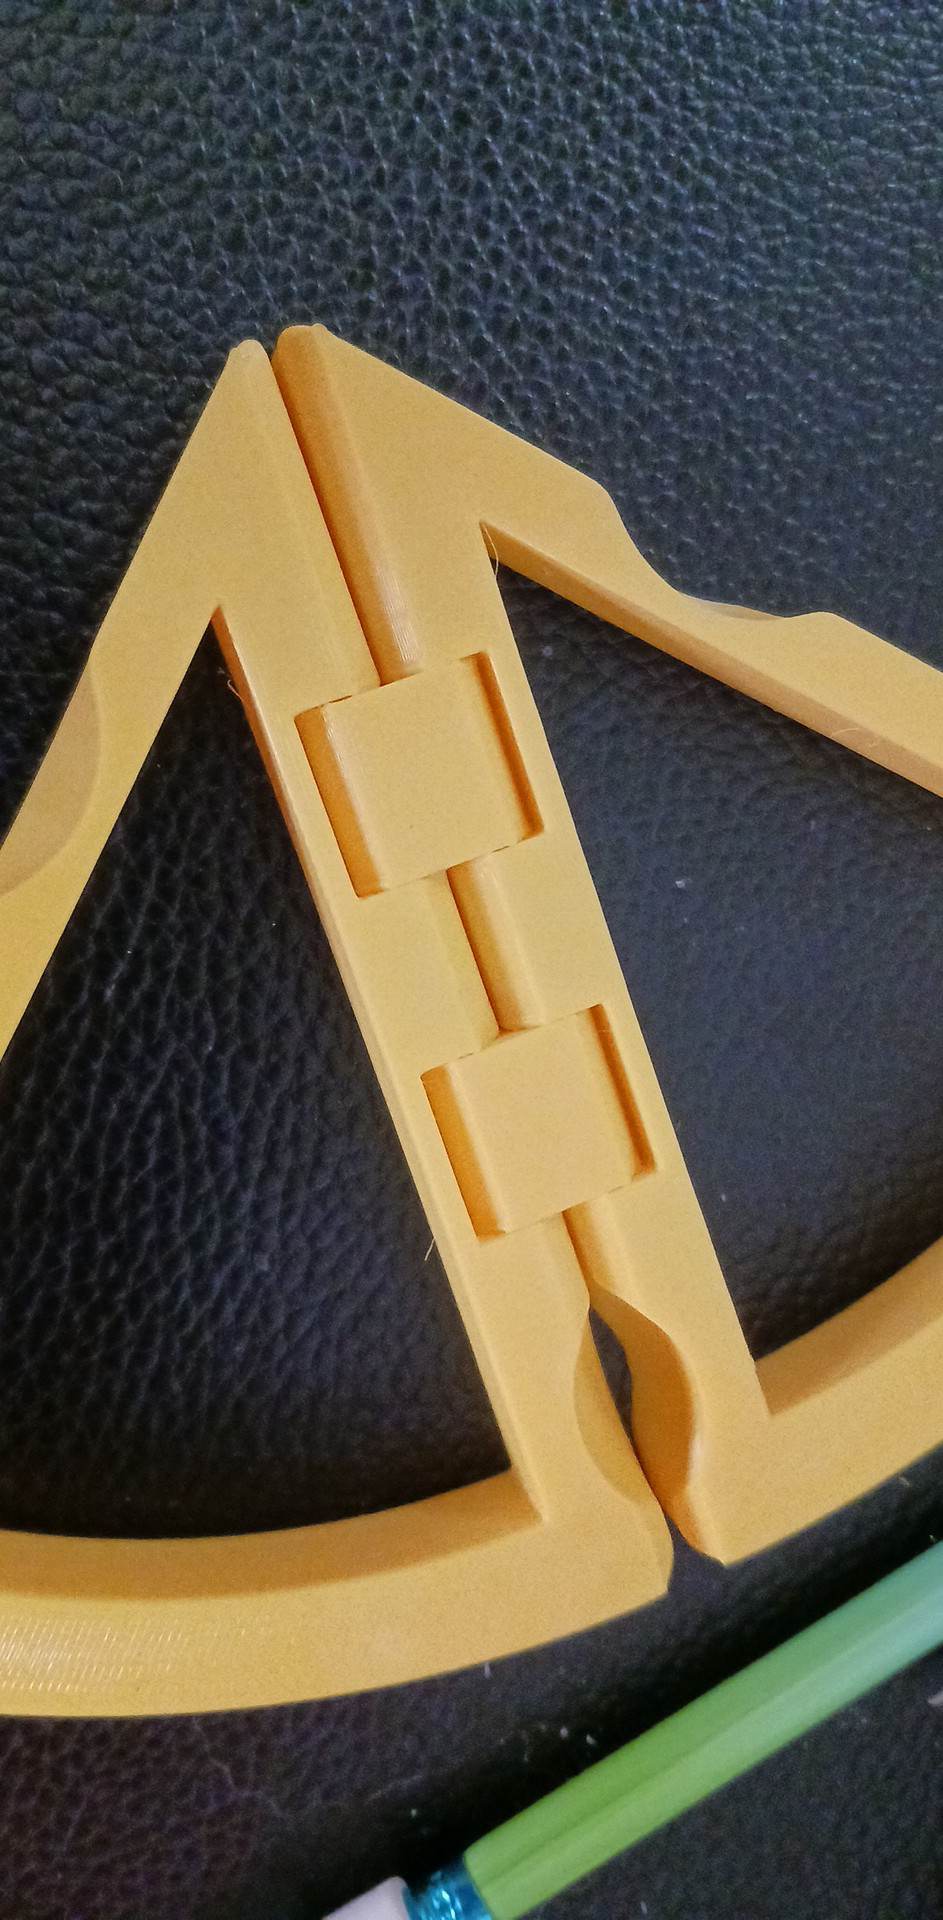
After printing, just move the articulations to get them free. The Cheese Box has a couple of holes for optional magnets (6 x 1.5 mm at default scale). The Cheese Box joints are meant to be tight. If they are too loose the box doesn't close properly and leaves some gaps. If they are fusing together, that means you are probably over-extruding. There are two ways to fix that:
- The quick fix is to adjust the XY expansion on the slicer, in your case by setting a small negative value (-0,1 or -0,2 should do).
- The not-so-quick fix (and recommended in the long term) is to calibrate your extrusion settings so the real extrusion width matches the slicer values. There are several online tutorials that explain how to do it, it's not that hard.
I've included a test piece, which is just the hinge: Cheese-Test_Joint.stl
This way you can test your new settings without printing the whole Cheese 😉
A good first layer is mandatory for the print to succeed. Be sure your printer is calibrated and you have good bed adhesion. I recommend a slow and thick first layer (8 mm/s and 0.3 mm).
Good layer cooling is also recommended, as it prevents curling and warping on overhangs.
After printing, just move the articulations to get them free. The Cheese Box has a couple of holes for optional magnets (6 x 1.5 mm at default scale). The Cheese Box joints are meant to be tight. If they are too loose the box doesn't close properly and leaves some gaps. If they are fusing together, that means you are probably over-extruding. There are two ways to fix that:
- The quick fix is to adjust the XY expansion on the slicer, in your case by setting a small negative value (-0,1 or -0,2 should do).
- The not-so-quick fix (and recommended in the long term) is to calibrate your extrusion settings so the real extrusion width matches the slicer values. There are several online tutorials that explain how to do it, it's not that hard.
I've included a test piece, which is just the hinge: Cheese-Test_Joint.stl
This way you can test your new settings without printing the whole Cheese 😉
For more tips, take a look at my printing tips.
| Date de publication | 06/10/2022 |
| Price | $3.99 |
| Sans support | YES |

in 4 attempts printing this cheese box, the hinges freeze/meld in place, making the lid inoperable. The attempts were printed on a Creality Ender 5, 40mms, 15% infill. As last resort, tried reducing line width from .42 & .44 to .40, but the frozen joint occurred again.